
Ceramic coating is often presented as one of the most advanced ways to protect a vehicle’s paint.
It can provide a highly glossy finish, hydrophobic behaviour and a protective layer over properly prepared automotive paint. But there is one important point that is sometimes overlooked:
The quality of a ceramic coating depends heavily on the preparation underneath it.
A coating does not magically correct poor paintwork.
If the surface contains contamination, scratches, swirl marks, polishing oils, residue or other imperfections, applying a coating over that surface may preserve those conditions underneath the protection layer.
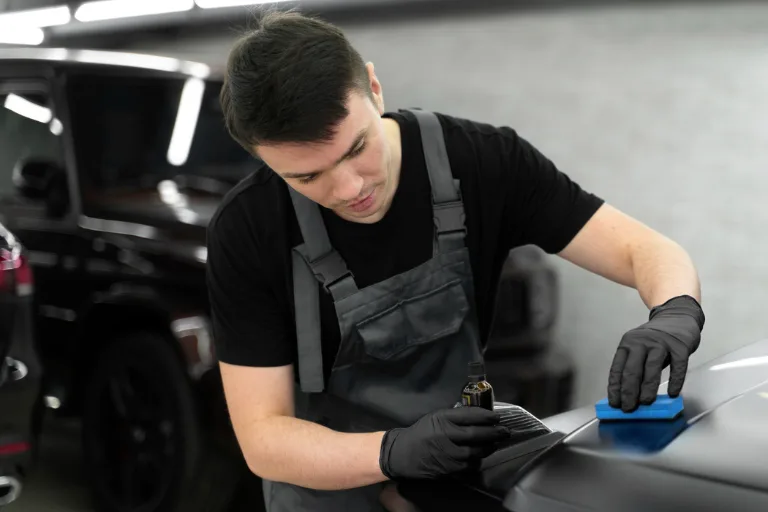
That is why professional ceramic coating is not simply about opening a bottle and applying a product.
The process should begin with inspection and preparation.
A well-prepared vehicle gives the coating a much better foundation and allows the final finish to look cleaner, clearer and more refined.
So, what actually matters before ceramic coating?
Let’s look at the process step by step.
1. Start With a Proper Vehicle Inspection
Before washing or polishing begins, the vehicle should be inspected carefully.
The detailer should understand:
- Current paint condition
- Existing scratches
- Swirl marks
- Water spots
- Oxidation
- Previous repairs
- Paint contamination
- Existing protection
- Areas requiring special attention
Inspection helps determine how much preparation the vehicle actually needs.
Not every car requires the same level of correction.
A relatively new and well-maintained vehicle may need a lighter preparation process, while an older or poorly maintained vehicle may require considerably more work.
The correct approach should be based on the actual condition of the paint.
2. Understand the Customer’s Expectations
Before beginning the job, it is also important to understand what the customer expects from the ceramic coating.
For example, the customer may want:
- Maximum gloss
- Easier maintenance
- Long-term paint protection
- Improved hydrophobic behaviour
- Better appearance
- Reduction in future contamination
- A premium finish for a new vehicle
The customer’s objective can influence the preparation strategy.
Someone looking for maximum visual refinement may require more paint correction before coating.
Someone primarily interested in protection may have different priorities.
A professional detailing studio should establish these expectations before starting.
3. Wash the Vehicle Thoroughly
The preparation process begins with a proper wash.
The goal is to remove loose dirt and surface contamination without unnecessarily creating new scratches.
A professional wash may involve:
- Pre-rinse
- Foam pre-wash
- Safe contact wash
- Wheel and tyre cleaning
- Rinsing
- Careful drying
The exact process depends on the vehicle’s condition.
The important point is that the paint needs to be genuinely clean before further preparation begins.
Washing is not simply about making the vehicle look clean.
It creates the starting point for the next stages.
4. Clean the Wheels and Other Areas Properly
Wheels, tyres, wheel arches and lower body sections can contain significant contamination.
Brake dust, road grime and other deposits can remain around these areas.
If these areas are ignored, contamination can potentially spread back onto already cleaned surfaces during the preparation process.
Professional detailing therefore treats the vehicle as a complete system rather than focusing only on the visible paint panels.
5. Perform Paint Decontamination
A vehicle can look clean after washing while still having bonded contamination on the paint.
This may include:
- Industrial fallout
- Tar
- Tree sap
- Road contamination
- Mineral deposits
- Embedded particles
Chemical and mechanical decontamination methods may be used depending on the contamination.
The purpose is to create a cleaner, smoother surface before polishing.
Decontamination is particularly important because polishing over bonded contamination can interfere with the process and potentially create additional surface issues.
6. Inspect the Paint Again
After washing and decontamination, the paint should be inspected again.
This stage can reveal defects that were difficult to see before cleaning.
The detailer may look for:
- Swirls
- RIDS or deeper isolated scratches
- Holograms
- Water spots
- Oxidation
- Paint haze
- Previous polishing marks
- Uneven areas
Strong inspection lighting can be particularly useful.
Different lighting angles can reveal different types of surface defects.
7. Decide Whether Paint Correction Is Necessary
This is one of the most important decisions before ceramic coating.
Not every vehicle needs extensive paint correction.
Depending on the condition, the vehicle may require:
- No polishing
- Light finishing polish
- One-step correction
- Two-step correction
- More extensive correction
The objective should be to prepare the surface appropriately rather than automatically selecting the most aggressive process.
A newer vehicle may still require some refinement.
A used vehicle with significant defects may require more extensive correction.
8. Use a Test Spot Before Full Correction
A test spot is one of the best ways to reduce guesswork.
The detailer can select a small section and test a combination of:
- Machine
- Pad
- Compound or polish
- Technique
The result can then be inspected.
The test spot helps determine:
- How the paint responds
- How much correction is achievable
- Whether the finish needs additional refinement
- Whether the selected process is unnecessarily aggressive
This is particularly important because automotive paint can behave differently from vehicle to vehicle.
9. Paint Correction Should Focus on the Final Goal
Paint correction before ceramic coating is not about chasing every defect at any cost.
The detailer needs to balance:
Appearance + Correction + Paint Safety
A deeper defect may not be safely removable through polishing.
Attempting to remove every scratch can sometimes involve unnecessary paint removal.
A professional detailer should therefore establish a realistic correction target before beginning.
10. Edges and Sensitive Areas Need Extra Attention
Certain areas of a vehicle require more careful treatment during machine polishing.
These may include:
- Body edges
- Sharp creases
- Trim
- Badges
- Sensitive painted areas
- Previously repaired panels
These areas can react differently to polishing.
Proper masking and controlled machine technique can help protect vulnerable areas during the correction process.
11. Refine the Paint After Correction
After the main correction stage, the paint may require a finishing step.
The purpose can be to improve:
- Clarity
- Gloss
- Smoothness
- Reflectivity
- Overall finish quality
A panel that looks good after cutting may still benefit from refinement.
The final finish should be inspected carefully before moving to coating preparation.
12. Remove Polishing Oils and Residue
This step is extremely important before ceramic coating.
Polishing can leave behind oils or residues on the surface.
These residues can make the paint appear better than it actually is and may interfere with the coating’s ability to properly bond to the surface.
A suitable panel preparation or surface-prep process can help remove these residues.
The exact product and method should follow the coating manufacturer’s instructions.
13. Perform a Final Paint Inspection
After surface preparation, the vehicle should be inspected one more time.
The detailer should check for:
- Remaining polishing residue
- Dust
- Streaks
- Smudges
- Contamination
- Missed defects
- Surface oils
- Water spots
The paint should be genuinely ready before the coating is opened.
This final inspection can make a significant difference to the quality of the application.
14. Control the Working Environment
Ceramic coating application should ideally take place in a clean and controlled environment.
Factors such as:
- Dust
- Temperature
- Humidity
- Air movement
- Lighting
- Workspace cleanliness
can influence the application process.
A clean environment reduces the chance of contamination during coating.
The exact temperature and humidity requirements should always be checked against the coating manufacturer’s technical guidance.
15. Choose the Right Ceramic Coating
Preparation is only one part of the process.
The coating itself should also be selected based on the vehicle and the customer’s requirements.
Consider factors such as:
- Intended durability
- Application requirements
- Maintenance expectations
- Vehicle usage
- Product compatibility
- Technician experience
- Manufacturer instructions
A coating should not be selected simply because it has the highest durability claim.
The product should fit the complete vehicle-care strategy.
16. Application Technique Matters
Even with excellent preparation, application technique remains important.
The technician needs to follow the coating manufacturer’s instructions regarding:
- Application area
- Flashing behaviour
- Wipe timing
- Towel selection
- Layering requirements
- Environmental conditions
- Curing
Different ceramic coatings can have different application characteristics.
Therefore, technicians should not assume that every coating behaves exactly the same way.
17. Inspect the Coating After Application
The work is not finished immediately after application.
The coated vehicle should be inspected carefully under appropriate lighting.
The technician should look for:
- High spots
- Uneven application
- Missed areas
- Streaks
- Residue
- Inconsistent finish
High spots can be particularly important to identify before the coating fully cures.
A final inspection gives the detailer an opportunity to correct application issues while appropriate corrective action is still possible.
18. Allow the Coating to Cure Properly
Ceramic coatings require appropriate curing conditions.
The exact curing requirements depend on the product.
The customer should receive clear instructions regarding:
- When the vehicle can be exposed to water
- When normal washing can resume
- Whether the vehicle should remain indoors
- When maintenance products can be used
- Any special precautions during the initial curing period
Following the manufacturer’s recommendations is essential.
19. Customer Aftercare Is Part of the Process
A professional ceramic coating service should not end when the vehicle leaves the studio.
Customers should understand how to maintain the coated vehicle.
Aftercare may include:
- Proper washing technique
- Suitable shampoo
- Safe drying
- Regular maintenance
- Avoiding harsh or unsuitable chemicals
- Periodic inspection
The coating’s performance over time depends not only on the coating itself but also on how the vehicle is maintained.
Common Mistakes Before Ceramic Coating
1. Applying coating over contaminated paint
A surface can look clean but still contain bonded contamination.
2. Skipping inspection
Without inspection, the preparation process becomes guesswork.
3. Assuming every car needs the same correction
Different vehicles require different approaches.
4. Using aggressive correction unnecessarily
Maximum correction is not always the safest or most appropriate option.
5. Leaving polishing oils on the surface
Proper surface preparation is essential before coating.
6. Ignoring environmental conditions
Application conditions can affect coating behaviour.
7. Rushing the final inspection
Small application issues can become more difficult to correct after curing.
8. Not explaining aftercare
Customers need to know how to maintain the coating after professional application.
A Professional Ceramic Coating Preparation Process
A practical workflow can be summarised as:
Inspect → Wash → Decontaminate → Inspect Again → Test Spot → Correct → Refine → Surface Prep → Final Inspection → Coat → Inspect → Cure → Maintain
Each stage has a purpose.
Skipping one stage may not always create a visible problem immediately, but it can affect the quality and consistency of the final result.
Why Preparation Matters More Than the Bottle
A premium ceramic coating product can be an important part of the service.
But the coating cannot compensate for poor preparation.
Consider two vehicles receiving the same coating.
One vehicle is:
- Properly washed
- Decontaminated
- Corrected where appropriate
- Refined
- Properly panel-prepped
- Coated in controlled conditions
The other receives minimal preparation before application.
The product may be identical.
The process is not.
This is why professional detailing is fundamentally about process, technician skill and consistency, not simply the product being used.
Ceramic Coating Preparation Checklist
Before applying a ceramic coating, a professional detailer should be able to answer:
- Has the vehicle been properly inspected?
- Has the paint been thoroughly washed?
- Has bonded contamination been removed?
- Have paint defects been identified?
- Is paint correction necessary?
- Has a test spot been performed where appropriate?
- Has the paint been refined?
- Have polishing oils and residue been removed?
- Has the surface been inspected under proper lighting?
- Is the workspace clean and controlled?
- Are environmental conditions suitable?
- Is the coating appropriate for the vehicle?
- Are manufacturer instructions being followed?
- Has the final coating been inspected?
- Has the customer received proper aftercare instructions?
If these questions can be answered confidently, the coating process has a much stronger foundation.
Final Thoughts
Ceramic coating preparation is much more than washing a car and wiping on a protective product.
The quality of the final result begins with the condition of the paint and the quality of the preparation.
A professional process may involve inspection, washing, decontamination, paint correction, finishing, surface preparation, environmental control, careful coating application and final inspection.