
A car can look stunning when it leaves the showroom, but everyday driving exposes its paintwork to stone chips, road debris, insects, scratches and environmental contaminants. For owners who want to preserve the vehicle’s finish, Paint Protection Film (PPF) can be a valuable option.
However, choosing the right film is only one part of the process. The quality of the installation plays an equally important role in how the finished vehicle looks and how well the film performs.
Two cars may have similar PPF products installed, yet the results can look noticeably different. One may have smooth, nearly invisible coverage with clean edges, while the other may show visible seams, trapped particles, lifting corners or uneven finishing.
The difference often comes down to preparation, installer skill, working conditions, material handling and attention to detail.
A professional PPF installation is not simply about applying a transparent layer over a car’s paint. It is a carefully controlled process that combines surface inspection, precise fitting, clean application and proper finishing.
Whether you own a luxury vehicle, manage an automotive detailing studio or are considering adding PPF services to your business, understanding these differences can help you make better decisions.
In this guide, we explore what separates a professional PPF installation from an average application, which quality indicators matter most and what customers should check before choosing an installer.
1. Thorough Paint Inspection Before Installation
A professional installation begins before the film touches the vehicle.
The installer should first inspect the paintwork to understand its condition and identify any existing defects. This step is important because PPF is transparent. It generally follows the contours of the surface beneath it rather than hiding imperfections.
Depending on the vehicle, the inspection may reveal:
- Swirl marks and fine scratches.
- Stone chips or deeper paint damage.
- Water spots and mineral deposits.
- Industrial fallout or bonded contaminants.
- Previous repainting or paint repairs.
- Existing coatings, waxes or other protection.
- Uneven finishes or areas requiring special attention.
The installer should document relevant pre-existing damage and discuss it with the customer before work begins.
For example, if the bonnet has noticeable swirl marks, applying PPF without addressing them may preserve those imperfections beneath the film. If the paint has deeper damage, the customer may need to consider repair options before installation.
A professional studio should explain what can reasonably be corrected, what should remain untouched and which areas may require specialist attention.
Why it matters: Proper inspection helps set realistic expectations, reduces the risk of disputes and provides a clear starting point for the job.
2. Correct Surface Preparation
Surface preparation is one of the most important stages of PPF installation.
Even a high-quality film can produce disappointing results when applied over an inadequately prepared surface. Small particles, residue or contamination may become visible beneath the film or interfere with adhesion.
A professional preparation process is selected according to the vehicle’s condition and the film manufacturer’s instructions.
It may include:
- Thorough washing to remove loose dirt.
- Safe removal of bonded contaminants.
- Appropriate chemical decontamination.
- Mechanical decontamination where necessary and suitable.
- Paint correction when agreed and required.
- Removal of incompatible waxes or residues.
- A final surface-cleaning process before application.
Not every vehicle needs extensive paint correction. A relatively new car in excellent condition may require less intervention than a vehicle with years of accumulated contamination and visible defects.
The goal is not to perform the same set of steps on every vehicle. It is to prepare the surface to the standard required for the specific installation.
Care is especially important around badges, trim, panel edges, washer nozzles and other areas where dirt can accumulate.
Skipping preparation to save time may lead to visible contamination, adhesion issues or avoidable rework.
3. Choosing the Right PPF for the Vehicle
Not all Paint Protection Films are identical.
Products can differ in thickness, construction, surface finish, flexibility, adhesive characteristics, warranty terms and maintenance requirements. Some are designed for a high-gloss appearance, while others offer a matte or satin finish.
A professional installer should help the customer understand which product is suitable for the vehicle and intended use.
Important considerations include:
| Factor | What to understand |
| Finish | Gloss, matte, satin or another available finish |
| Film construction | Product design and material specifications |
| Flexibility | Suitability for the vehicle’s curves and contours |
| Surface properties | Hydrophobic or self-healing features, if specified |
| Durability | Expected performance under the stated conditions |
| Warranty | Coverage, exclusions and claim requirements |
| Maintenance | Approved cleaning products and care instructions |
For instance, an owner of a vehicle with a factory matte finish may want a compatible film that preserves the intended appearance. A gloss film could change the visual result.
Similarly, someone who drives frequently on highways may prioritise protection for areas exposed to stone chips and road debris.
The installer should explain the product’s actual capabilities without promising that PPF will prevent every scratch, chip or form of paint damage.
A professional recommendation is based on the vehicle, the customer’s expectations and verified product specifications—not simply on choosing the most expensive film.
4. Accurate Pattern Selection and Cutting
Precision fitting is another major difference between a professional installation and an average one.
PPF can be installed using pre-cut patterns, custom cutting or a combination of both, depending on the vehicle, the panel and the installation method.
Pre-cut patterns are designed for specific vehicle shapes and can help reduce the need to cut directly on the paint. Their accuracy depends on the pattern data, vehicle variant and how the installer positions and adjusts the film.
Custom cutting may offer flexibility for particular areas, but cutting near painted surfaces requires careful technique and appropriate precautions.
A professional installer considers:
- Whether the pattern matches the exact vehicle variant.
- How the film aligns with panel contours.
- Whether visible seams are necessary.
- How much edge coverage is practical.
- How the film will fit around sensors, trim and openings.
- Whether the selected method protects the underlying paint.
Complex bumpers, deep recesses, sharp body lines and highly contoured panels require particular attention.
The objective is a consistent fit that follows the vehicle’s design while respecting the film’s limitations and installation requirements.
5. Clean Working Conditions and Controlled Film Handling
A detailing studio does not need to look elaborate to deliver excellent work, but it should provide suitable conditions for handling and applying film.
Dust and airborne particles can become trapped beneath transparent PPF, where they may remain visible after installation.
A professional installer therefore pays attention to cleanliness throughout the process.
Useful practices include:
- Cleaning the vehicle and work area before installation.
- Keeping tools and application materials clean.
- Handling the adhesive surface carefully.
- Reducing unnecessary dust and airborne contamination.
- Using appropriate lighting to inspect the film.
- Maintaining suitable environmental conditions according to the product instructions.
The application area should also allow the installer to move safely around the vehicle and access the relevant panels without unnecessary obstruction.
A clean environment cannot eliminate every particle, but it reduces the likelihood of contamination and supports more consistent results.
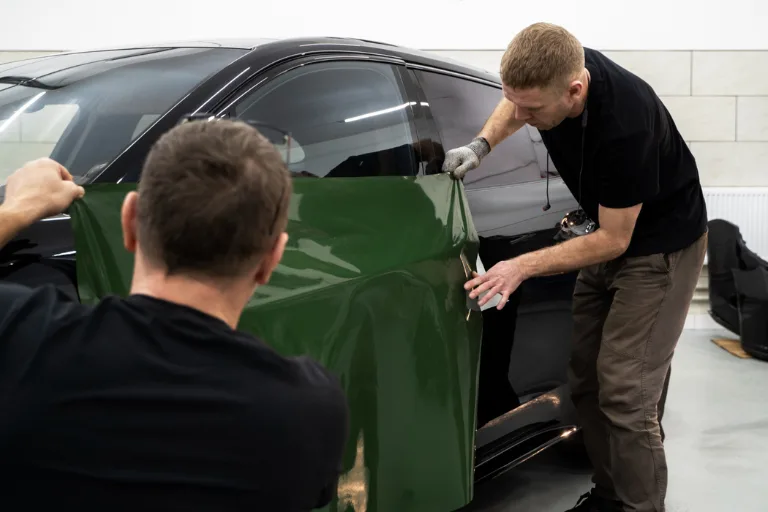
6. Skillful Film Application and Squeegee Technique
Applying PPF involves more than placing film on a panel and smoothing it out.
The installer must position the material correctly, manage the application solution where applicable, control tension and remove liquid and air without creating unnecessary stress on the film.
Different panels require different techniques.
A broad, relatively flat bonnet presents different challenges from a sharply contoured bumper or a panel with deep recesses.
During application, the installer needs to manage:
- Film alignment.
- Stretch and tension.
- Squeegee pressure and direction.
- Water or application-solution removal.
- Wrinkles and creases.
- Air pockets and trapped contamination.
- Stress around edges and complex curves.
Excessive stretching may affect the film’s appearance or create stress that contributes to lifting. Poor squeegee technique can leave visible marks, pockets or uneven areas.
The correct approach depends on the film’s construction and the manufacturer’s installation guidance.
An experienced installer understands when to reposition material, when to release tension and when a panel requires a different application strategy.
The objective is not simply to finish quickly. It is to achieve a clean, well-fitted result while protecting the vehicle’s paint.
7. Clean Edges and Seam Placement
Edges are among the easiest places to notice the difference between an average and a carefully finished PPF installation.
On some panels, film edges may be nearly invisible. On others, the vehicle’s shape or the installation method may make certain edges or seams visible.
A professional installer plans edge placement according to the panel design, available patterns, film limitations and practical access.
Good finishing generally aims for:
- Consistent alignment.
- Clean, well-finished edges.
- Minimal visible lifting or contamination.
- Appropriate treatment around curves and recesses.
- Sensible seam placement.
- No unnecessary exposure of vulnerable painted areas.
Wrapped edges can provide a more discreet appearance in suitable locations, but they are not appropriate or possible for every panel.
The installer should avoid stretching the film excessively simply to hide an edge. Long-term adhesion and material stability are more important than achieving a particular visual effect at any cost.
Before work begins, ask which areas will have exposed edges and why. This makes the expected result clearer and helps prevent misunderstandings at handover.
8. Attention to Complex Panels and High-Impact Areas
Some parts of a vehicle are more difficult to protect neatly than others.
Bumpers, mirror housings, door handles, side skirts and panels with deep curves often require additional skill. The right approach depends on the vehicle’s design and the film’s capabilities.
These areas may involve tight contours, multiple direction changes, sensors, openings or complex edges.
A professional installer evaluates each panel individually instead of assuming that one application method will work everywhere.
The installer may need to decide whether to use a pre-cut pattern, adjust the coverage, position seams carefully or explain why a particular section cannot be wrapped as expected.
Customers should also understand that coverage packages differ.
A partial-front package may protect only selected sections, while a broader package may include additional painted panels. The exact inclusions should be documented in the quotation.
Do not assume that a package labelled “full front” or “full body” includes every painted surface, trim component or difficult-to-access area. Request a clear panel-by-panel coverage list.
9. Inspection, Curing and Final Quality Checks
A professional installation does not end when the last panel is covered.
The installer should inspect the vehicle carefully and explain any areas that need further observation as the film settles.
Depending on the product, environmental conditions and panel complexity, some moisture appearance or minor visual changes may evolve during the initial settling period. Customers should receive guidance on what is normal and what needs attention.
Final inspection should consider:
- Alignment and panel coverage.
- Visible contamination.
- Air pockets, creases or other application defects.
- Edge condition and adhesion.
- Seams and transitions.
- Areas around trim and accessories.
- Any agreed exclusions or pre-existing damage.
The installer should follow the manufacturer’s guidance for drying, curing or settling, as applicable. There is no single universal waiting period that applies to every film and installation.
If a concern appears after delivery, the customer should know how to contact the studio and what follow-up support is available.
A careful handover demonstrates that the installer is concerned not only with applying the film but also with the quality of the finished work.
10. Aftercare Guidance and Customer Support
Even a well-installed PPF needs appropriate care.
Customers should understand how to clean the film, which products to avoid and how to respond if an edge begins to lift or a section is damaged.
Aftercare guidance should be specific to the product installed.
It may cover:
- When washing can safely resume.
- Recommended washing methods.
- Suitable cleaning products.
- Care around film edges.
- Use of pressure washers at an appropriate distance and angle.
- Inspection for lifting, damage or contamination.
- How to request professional support.
Avoid assuming that every ceramic coating, polish, solvent or maintenance product is compatible with every PPF. Confirm compatibility with the film manufacturer.
If the film is damaged, customers should consult the installer about repair or replacement options rather than attempting aggressive cleaning or pulling at the damaged edge.
The installation documentation should also identify the product used, coverage areas, applicable warranty details and any conditions that could affect warranty eligibility.
11. Professional PPF Installation vs Average Installation
The difference becomes easier to understand when the main stages are compared side by side.
| Stage | Average or poorly managed process | Professional approach |
| Initial inspection | Existing defects may be overlooked | Paint condition and pre-existing damage are documented |
| Preparation | Cleaning may be rushed | Preparation is tailored to the vehicle’s condition |
| Film selection | Product may be selected without clear justification | Product features and limitations are explained |
| Pattern fitting | Alignment and panel coverage may be inconsistent | Patterns and application methods are chosen carefully |
| Application | Tension and squeegee work may be inconsistent | Technique is adapted to panel shape and film requirements |
| Edge finishing | Edges or seams may be poorly planned | Edge placement and finishing are considered in advance |
| Quality control | Limited final inspection | Panels and critical areas are checked before handover |
| Aftercare | General or incomplete advice | Product-specific care and follow-up guidance are provided |
The distinction is not simply about whether the installer uses expensive equipment or works in a premium studio.
Professionalism is reflected in the process, the decisions made throughout the job, the quality of the finished work and the clarity of customer communication.
12. How Customers Can Choose a Professional PPF Installer
Before booking a PPF installation, ask questions that reveal how the studio works.
Review previous installation work
Ask to see examples of completed vehicles, especially those with body shapes or finishes similar to yours. Look closely at edges, seams, corners and complex panels.
Understand the film being offered
Ask for the product name, available technical information, warranty conditions and maintenance instructions. Confirm that the product is appropriate for your intended finish and usage.
Request a written coverage plan
The quotation should clearly identify which panels are included and whether any areas will remain uncovered.
Discuss preparation and paint correction
Find out how the vehicle will be inspected and whether correction or additional preparation is recommended. Any extra work should be explained and approved before it begins.
Ask about the installation process
Understand whether the studio uses pre-cut patterns, custom cutting or a combination of methods, and how it handles complex panels.
Clarify aftercare and warranty support
Ask what happens if an edge lifts, a defect becomes visible or a section needs attention after delivery. Confirm the applicable terms in writing.
A good installer should be willing to explain the process in straightforward language. You should not need to rely on technical jargon or broad promises to understand what you are buying.
13. Why Installation Quality Matters for Detailing Businesses
For detailing studios, PPF installation is not only a technical service. It is also an important part of the customer experience and business reputation.
Customers may judge the quality of the work by the appearance of the film, but the business also needs a repeatable process behind every installation.
A professional workflow can include:
- A documented vehicle inspection.
- A written quotation and coverage plan.
- Product and pattern verification.
- A preparation checklist.
- Panel-by-panel installation checks.
- A final quality-control inspection.
- Customer handover and aftercare documentation.
These steps help make service delivery more consistent, particularly when multiple installers work in the same studio.
Staff training, appropriate tools, clean working conditions and clear responsibility for quality checks also contribute to a better process.
Studios should track common defects and rework rather than relying only on customer feedback. Reviewing these patterns can help identify where additional training or process improvements are needed.
The aim is to create a reliable service that customers can understand, evaluate and confidently recommend.
Conclusion
A professional PPF installation is defined by much more than the film itself.
It begins with understanding the vehicle’s paint condition, selecting a suitable product and preparing the surface correctly. It continues through precise pattern fitting, controlled application, careful edge finishing and thorough inspection. Finally, it includes clear aftercare guidance and support when the customer needs assistance.
These details may not all be obvious in a photograph, but they can make a meaningful difference to the finished appearance and the overall ownership experience.
For vehicle owners, the best approach is to compare installers based on their process, product knowledge, workmanship and willingness to explain the details. For detailing businesses, a documented workflow and consistent quality control can help build customer trust over time.