

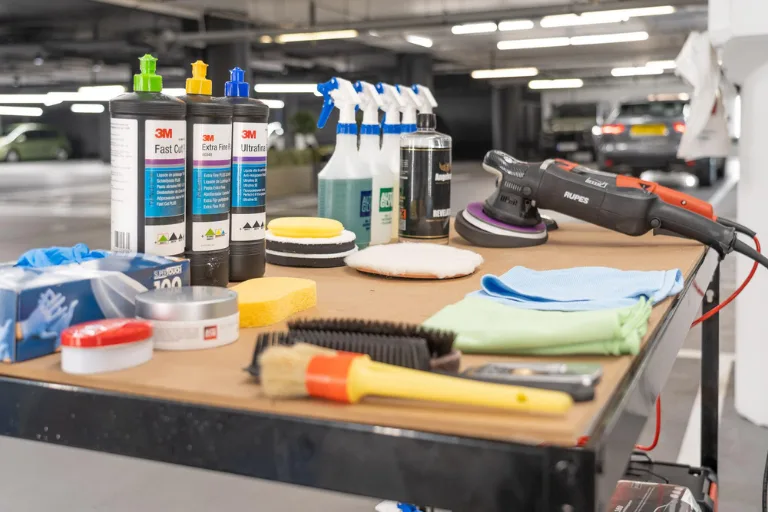
How to Choose the Right Compound for Paint Correction
Paint correction is one of the most valuable services offered by professional automotive detailing studios. It restores the vehicle’s finish by removing swirl marks, oxidation, scratches, water spots, and other paint imperfections, bringing back clarity and gloss. However, achieving professional results isn’t just about having a polishing machine—it begins with selecting the right paint correction compound.
Many beginners assume that using the most aggressive compound will produce the best outcome. In reality, choosing the wrong compound can remove unnecessary clear coat, leave haze, or even create additional defects. Professional detailers understand that successful paint correction depends on evaluating the vehicle, understanding the paint system, selecting the correct pad and machine, and matching the compound to the condition of the paint.
If you’re looking to deliver consistent, high-quality results, understanding how to choose the right compound is an essential part of the detailing process.
Understand What a Paint Correction Compound Does
A paint correction compound is an abrasive polishing product designed to level the surface of automotive paint by removing a very thin layer of clear coat. This process eliminates or reduces visible imperfections such as:
- Swirl marks
- Light and deep scratches
- Oxidation
- Water spot etching
- Sanding marks
- Paint haze
Unlike waxes or glazes, which temporarily hide defects, compounds permanently improve the appearance of the paint by correcting the surface itself.
Always Inspect the Paint Before Choosing a Compound
Professional paint correction begins with inspection—not polishing.
Before selecting any compound, carefully evaluate the vehicle’s paint using proper lighting. LED inspection lights reveal defects that may not be visible under normal garage lighting.
During inspection, check for:
- Swirl marks
- Surface scratches
- Oxidation
- Paint fading
- Water spots
- Previous polishing marks
- Repainted panels
Understanding the actual condition of the paint allows you to choose a compound that removes defects efficiently without unnecessary cutting.
Match the Compound to the Severity of Defects
Not every vehicle requires a heavy-cut compound.
The goal should always be to use the least aggressive compound capable of achieving the desired result.
Light Defects
If the paint has:
- Fine swirl marks
- Minor wash marring
- Light oxidation
A finishing or medium-cut compound is often sufficient.
Moderate Defects
For vehicles showing:
- Noticeable scratches
- Moderate oxidation
- Water spot etching
A medium-cut compound paired with an appropriate polishing pad usually delivers excellent correction while maintaining a high-quality finish.
Heavy Defects
Vehicles with:
- Deep scratches
- Severe oxidation
- Heavy sanding marks
may require a heavy-cut compound before refining the finish with a polishing compound.
Using a highly aggressive compound on lightly damaged paint removes more clear coat than necessary and increases polishing time.
Understand Different Paint Types
Automotive paint systems vary significantly between manufacturers.
Some vehicles have extremely hard clear coats, while others feature much softer finishes.
Hard Paint
Common characteristics:
- More difficult to correct
- Requires stronger compounds
- Takes longer polishing cycles
- Better scratch resistance
Soft Paint
Characteristics include:
- Easier correction
- Finishes quickly
- More susceptible to haze
- Requires careful finishing
Knowing the paint hardness helps determine both the compound and polishing technique required.
Pad Selection Is Just as Important
The polishing pad dramatically influences how a compound performs.
Professional detailers consider the compound and pad as one complete correction system.
Common pad types include:
Cutting Pads
Best suited for:
- Heavy correction
- Deep scratches
- Oxidation removal
Polishing Pads
Ideal for:
- Moderate correction
- Refining previous polishing
- Removing light defects
Finishing Pads
Used for:
- Final gloss enhancement
- Jeweling paint
- Applying finishing polish
The same compound may behave differently depending on the pad being used.
Perform a Test Spot First
Experienced detailers rarely polish an entire vehicle immediately.
Instead, they perform a test spot on a small section of the paint.
This allows them to determine:
- Whether the chosen compound is aggressive enough
- If a softer approach is possible
- How many polishing passes are required
- Whether a finishing step is needed
A successful test spot saves time and ensures consistent correction across the vehicle.
Machine Choice Affects Compound Performance
Different polishing machines influence how compounds perform.
Dual-Action Polishers
- Safer for beginners
- Lower risk of burning paint
- Excellent finishing quality
- Suitable for most detailing work
Rotary Polishers
- Higher correction ability
- Faster defect removal
- Requires greater experience
- Increased risk if used improperly
Selecting the right machine helps maximize the effectiveness of your chosen compound.
Don’t Ignore Working Conditions
Environmental conditions also affect polishing performance.
Professional detailing studios maintain controlled conditions to ensure consistent results.
Ideal conditions include:
- Clean workspace
- Good lighting
- Moderate temperature
- Low dust levels
- Dry paint surface
Working in direct sunlight or on hot panels can cause compounds to dry too quickly, reducing effectiveness and making residue harder to remove.
Less Product Often Produces Better Results
One of the most common mistakes is using too much compound.
Applying excessive product:
- Creates unnecessary dust
- Increases cleanup time
- Reduces cutting efficiency
- Causes pad saturation
Professional detailers use only the amount required for each polishing cycle and clean their pads regularly to maintain performance.
Follow Up with a Finishing Polish
Heavy compounds remove defects effectively but may leave slight haze or micro-marring.
To achieve maximum gloss, professionals usually follow the correction stage with a finishing polish.
This second step:
- Enhances clarity
- Increases depth of reflection
- Removes polishing haze
- Creates a showroom-quality finish
The result is a smooth, refined surface ready for ceramic coating, wax, or paint sealant.
Protect the Corrected Paint
Paint correction removes imperfections, but the work isn’t complete until the paint is protected.
Professional studios typically recommend:
- Ceramic coating
- Paint sealant
- Premium wax
- Paint Protection Film (PPF)
These protective solutions help preserve the corrected finish, reduce future contamination, and make routine maintenance easier.
Common Mistakes to Avoid
Many beginners encounter avoidable issues during paint correction.
Some of the most common mistakes include:
- Choosing a compound that’s too aggressive
- Skipping paint inspection
- Using the wrong polishing pad
- Working on dirty paint
- Applying too much pressure
- Using excessive product
- Skipping the finishing stage
- Failing to protect the corrected surface
Avoiding these mistakes improves both the quality of the finish and the long-term health of the vehicle’s paint.
Conclusion
Choosing the right paint correction compound is about more than selecting a product from a shelf. It requires understanding the condition of the paint, evaluating the severity of defects, selecting the correct pad and machine, and following a systematic correction process. Professional detailers know that successful paint correction comes from balancing product selection with skill, patience, and proper technique.